Step One
Installation of Microsoft Office 97 will change your Internet e-mail settings.
The following guide will get you setup to use the new multi-use program ĹOutlookĺ. If youĺd like to continue using Internet Mail with
your connection, continue to the bottom of this page for details on how to do that.
Run Outlook and click on the Tools drop-down menu.
Click on ĹOptionsĺ
Click on ĹServicesĺ to open the Services Dialog Box
Click on Add
Click on Internet Mail
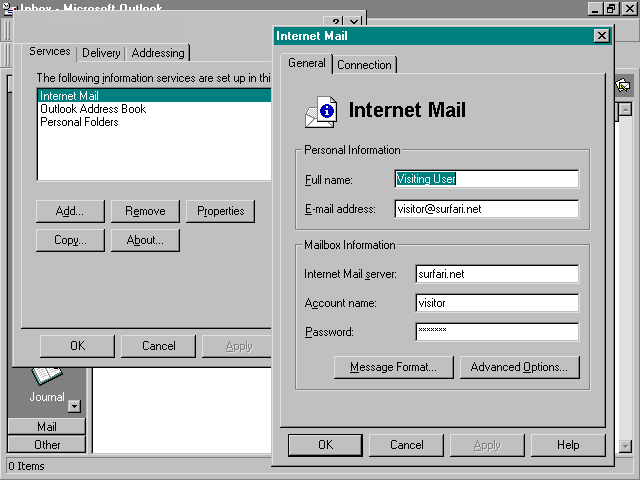
Click on the ĹGeneralĺ Tab
In the Personal Information Section, fill in the following:
Full Name: Your real name
E-Mail Address: Your full e-mail address (me@surfari.net)
Internet Mail Server: surfari.net
Account Name: Just your account name (me)
Password: Your login password
Click on the ĹAdvanced Optionsĺ button
In the box, enter: mail.surfari.net
Click on the ĹViewĺ drop-down menu
Click on ĹOptionsĺ
Click on the ĹProgramsĺ Tab
In the ĹMail and ĹNewsĺ section near the top of the screen,
Drop down the menu selection for ĹMailĺ and select 'Internet
Mail.'
Click on ĹApplyĺ
Click on the ĹMailĺ Tool Icon and then click on ĹRead Mailĺ to verify Internet Mail comes up.