 Dial-Up Networking Help for Windows Millenium (ME)
Dial-Up Networking Help for Windows Millenium (ME)
Dial-Up Networking Help for Windows Millenium (ME)
If you have any questions about configuring Dial-Up Networking, please call Surfari Internet or write to help@surfari.net
You may notice minor cosmetic differences between the screen shots supplied here, and your computer. This will not effect where the items are or the way it should be setup.
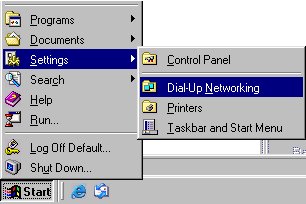
First we will need to open your Dial-Up Networking by clicking on your "Start" button, go up to "Settings" and then click on "Dial-Up Networking as shown here. |
 |
Locate the icon called Surfari Internet. If you only have the Make New Connection icon, you need to create a connection called Surfari Internet by double clicking on the "Make New Connection" icon. It will take you through several screens. The first one will ask you for a name for this connection, call it "Surfari Internet". The next step will want a phone number, if it's not in there, enter the aera code of 805, then select the dial-up number you will need from our list here: HERE and type it in and click on the "Next" button. The last screen will come up, now click "Finish".
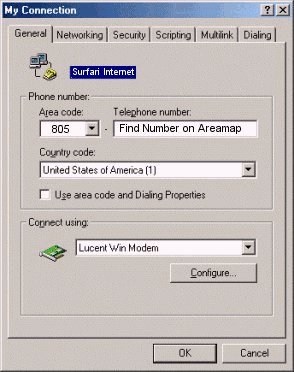
Once you have the Surfari Internet icon, right click on it, and click on "Properties". |
 |
|
Here you can verify that you do have the dial-up phone number. You can check to make sure you by referring to our online access list HERE . Please be sure the number you are dialing is local to you. Surfari Internet cannot assume any liability for toll charges incurred. Also, the "modem" that is displayed on this screen under "Connect Using" is just an example, yours will most likely have a different name. |
 |
|
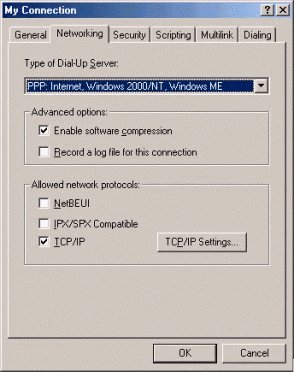
Make sure that you have PPP selected for the Type of Dial-Up Server. Under Advanced options the only one you should have selected is Enable Software Compression. Under Allowed network protocols the only one that should be selected is TCP/IP. Selecting anything else, may cause compatibility issues and/or may prevent you from getting connected. Now click on the "TCP/IP Settings" button on this screen. |
 |
|
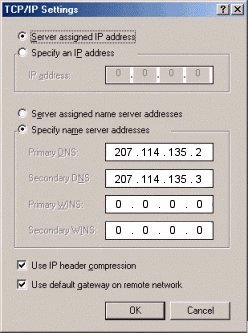
At the top of this screen, there should be a "black dot" selected next to "Server assigned IP address. For the next set of 2 choices (Server assigned named server addresses or Specify name server addresses) make sure to put a "black dot" next to "Specify name server addresses" as shown. Replace the "zero's" in the locations of "Primary DNS" and "Secondary DNS" as shown. Leave "zero's" in the locations for both the WINS server entries. Verify that both the "Use IP header compression" and "Use default gateway on remote network" are checked. |
 |
|
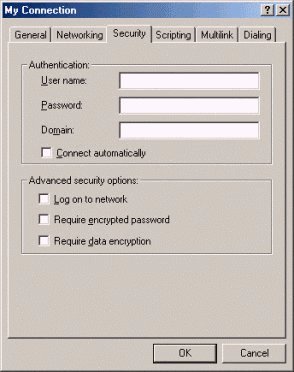
Now click on the tab at the top of this window called "Security". In this window, you will need to fill in your account name and password. Your account name is the 1 to 8 character name you setup with us (first part of your email address) and your password is the 4 to 8 character code you setup. Leave "Domain" blank and the rest of the options unchecked. |
 |
|
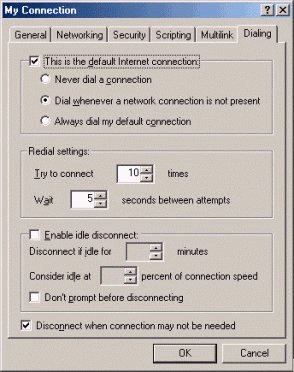
Now click on the tab at the top of this window called "Dialing". Verify that all the options shown on this screen are setup the same on your screen. The Click on the "Ok" button at the bottom of the screen, close up your Dial-Up Networking window and you should be set! |
 |